Integration with WhatsApp
Before Start
⚠ IMPORTANT: HeiChat AI requires WhatsApp Business API integration. Please note:
- Regular WhatsApp accounts will not work
- Standard WhatsApp Business accounts will not work
- You must have an approved WhatsApp Business API account through Meta Business platform
Prerequisites:
- A verified Meta Business account
- Approved WhatsApp Business API access
- Completed WhatsApp Business API configuration
Step 1: Getting Started with WhatsApp Integration
- Go to shopify and install HeiChat
- https://apps.shopify.com/chatgpt-customer-service-bot
- Set up your HeiChat by configure
Step 2: Setting Up Meta (Facebook) Business Account and App
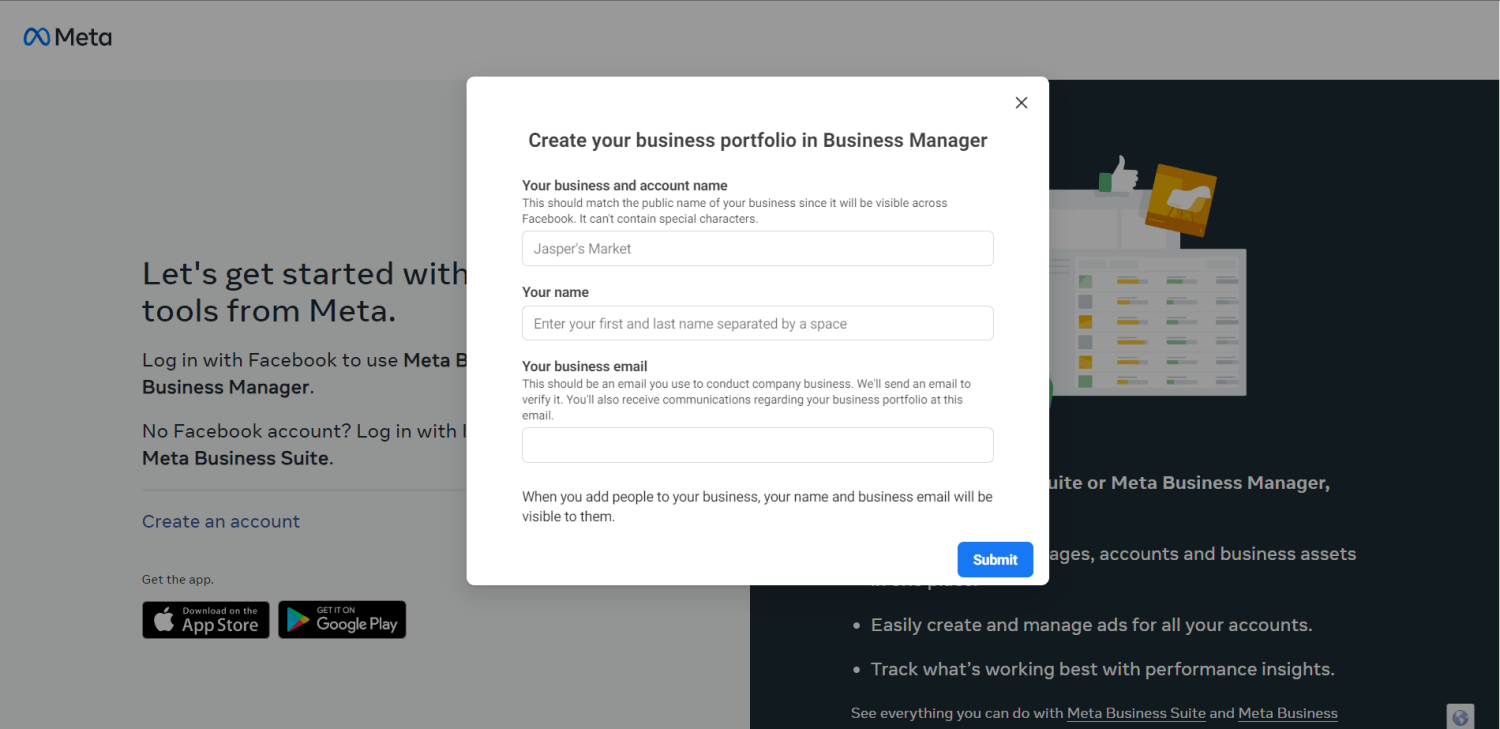
- Create a Meta (Facebook) Business Account:
- Visit here.
- Enter your business name, your name, and work email address. Click "Next".
- Provide your business details and click "Submit".
- Enter your business details and click Submit.
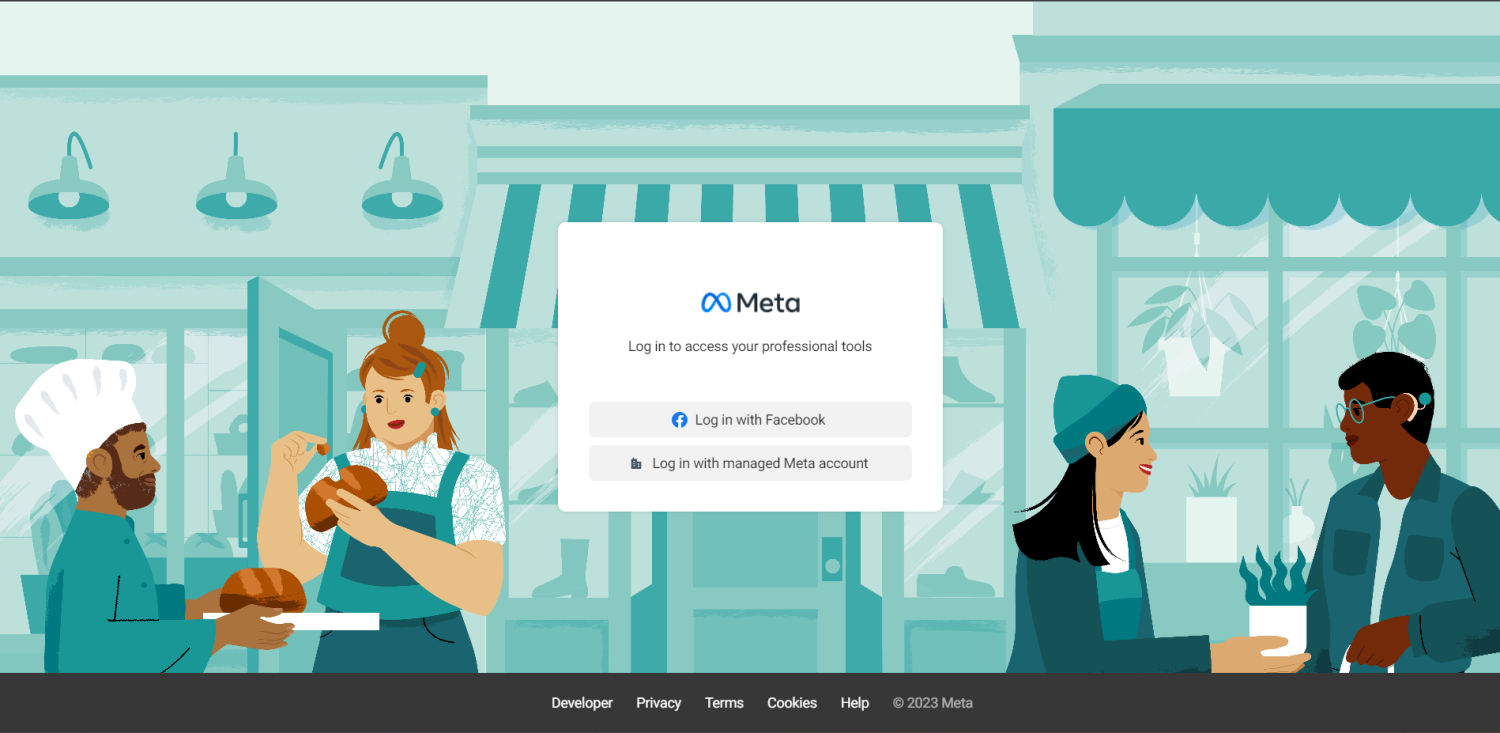
2. Create a new Meta (Facebook) App at https://developers.facebook.com/.
- "Log in" to your Meta (Facebook) Developer Account.
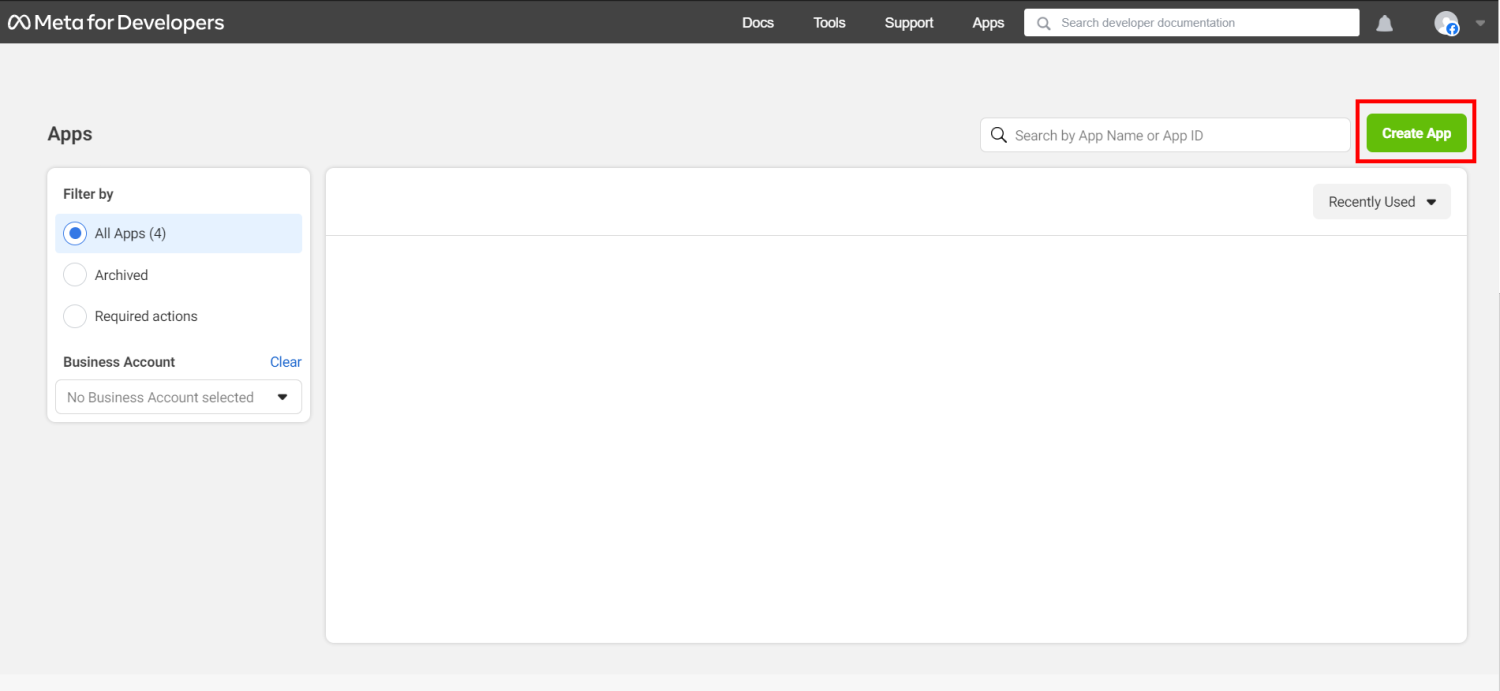
- Select "My Apps".

- Click "Create App"
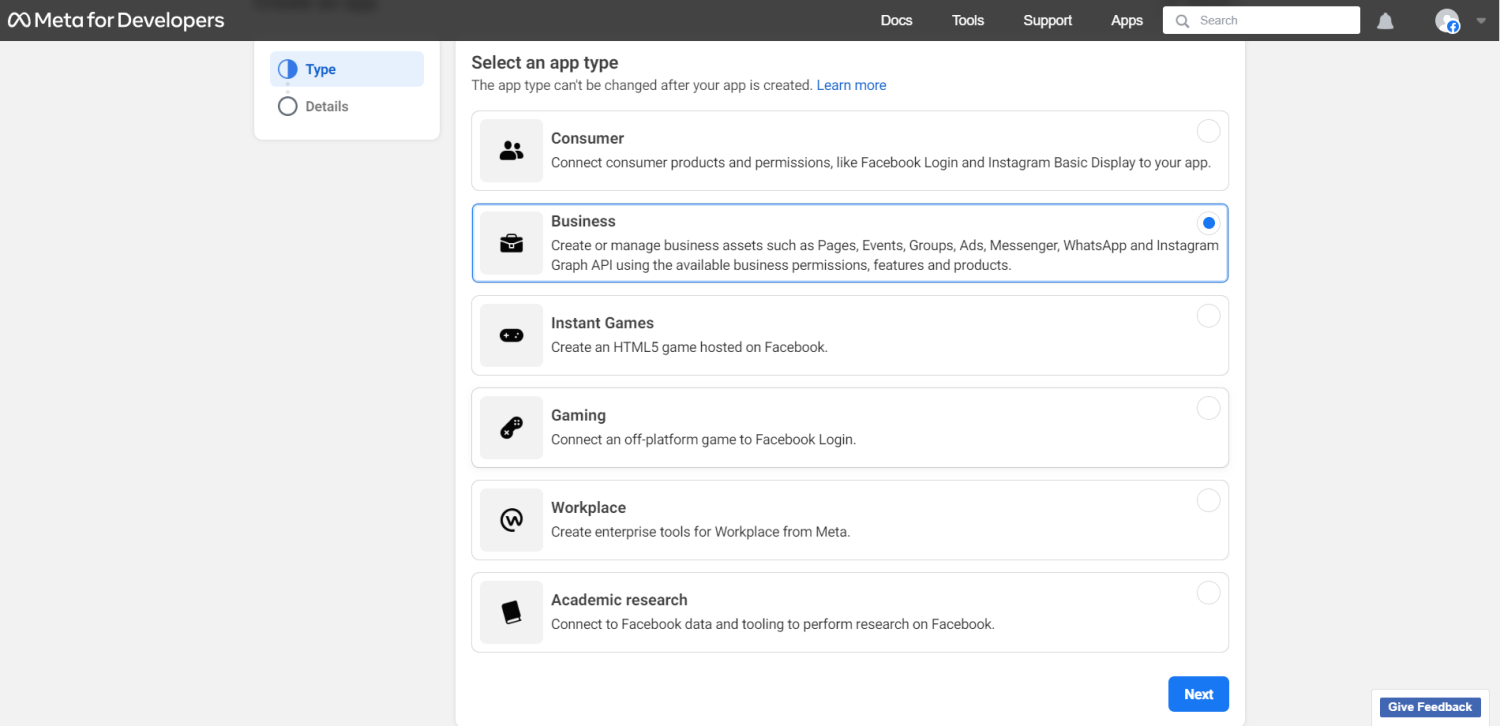
- Choose User Case: "Other" and click "Next".
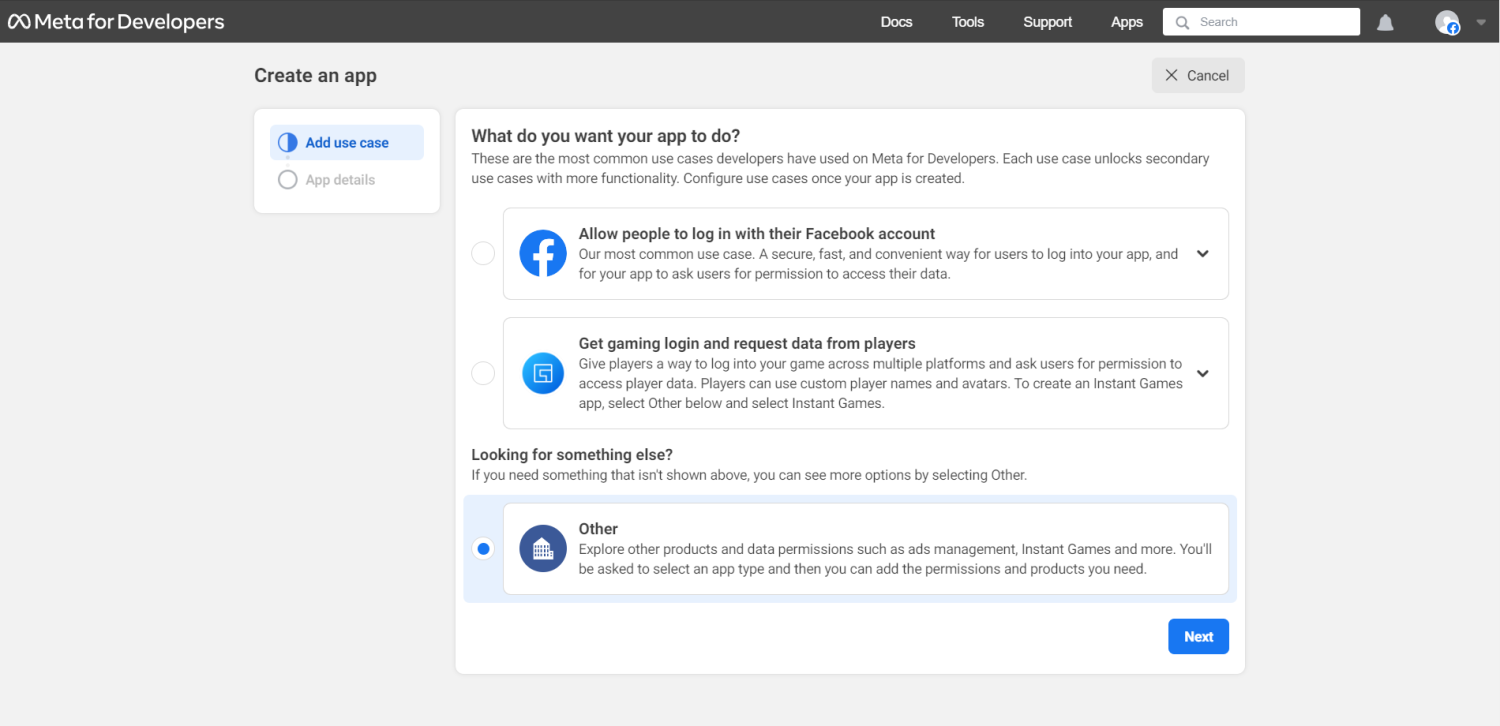
- Choose App Type: "Business" and click "Next".
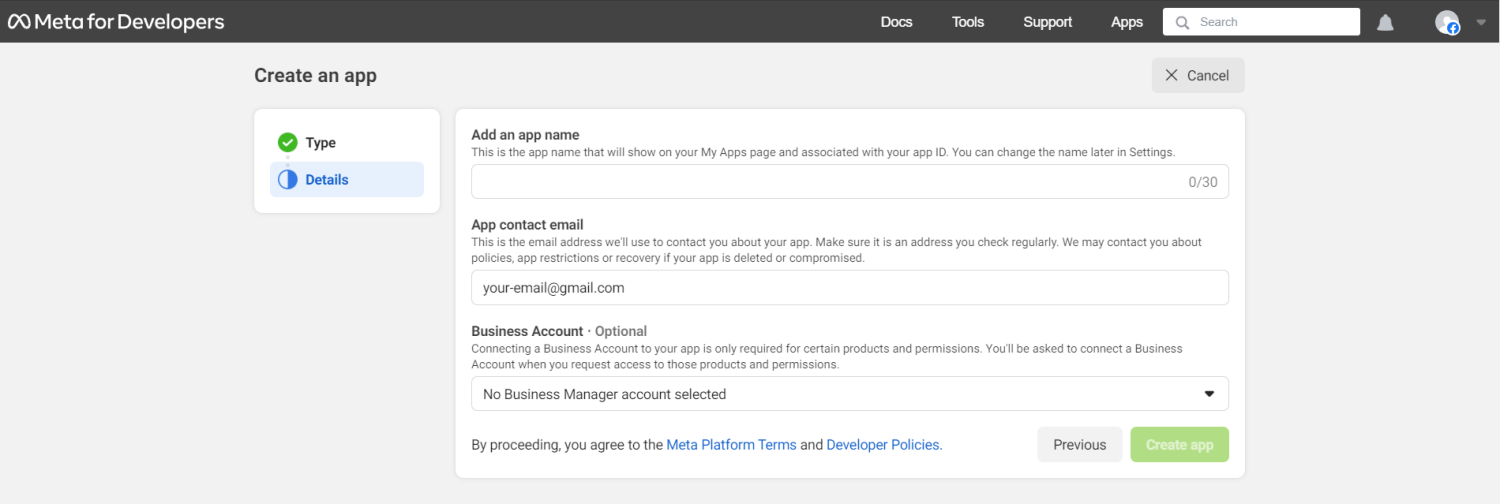
- Provide app details: App Name, App Contact Email, Business Account (Optional), and click "Create app".
Step 3: Setting Up Meta (Facebook) App for WhatsApp Integration
1. Add WhatsApp to your Meta (Facebook) App.
- In the "Developers Dashboard", choose your app.
- Locate "Add products to your app" in your app's dashboard tab.
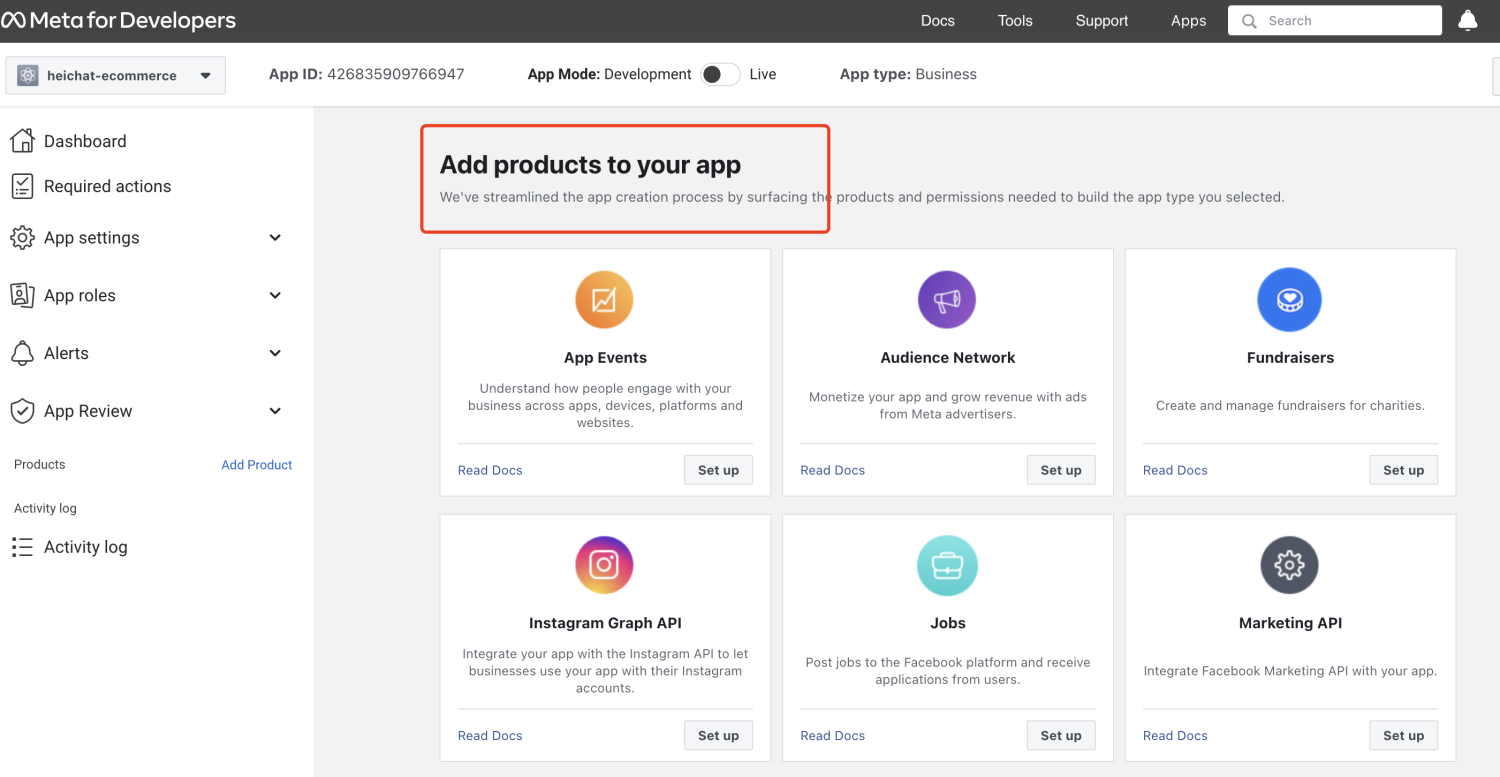
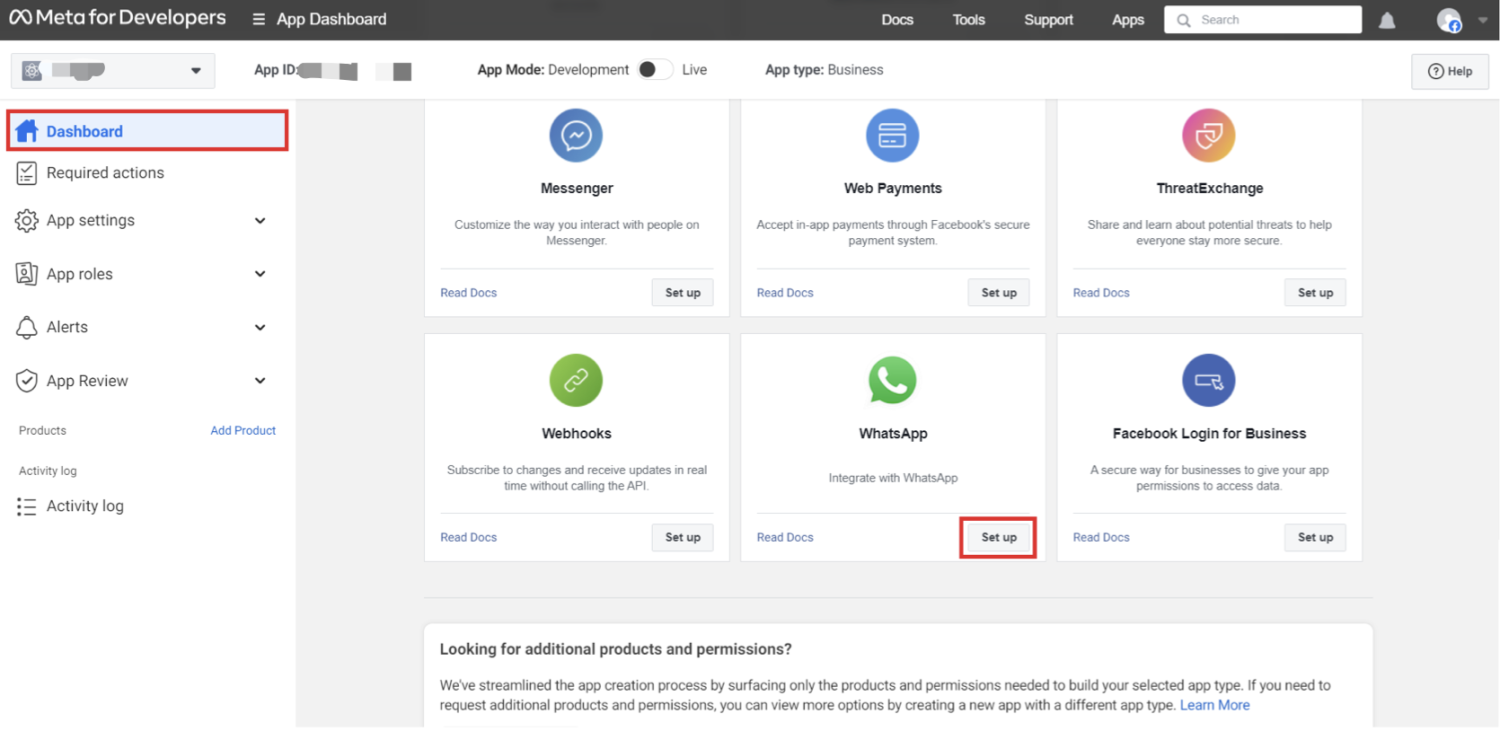
- Choose "WhatsApp" for setup.
- Select your Meta (Facebook) Business Account (if not selected in step 2).
- Navigate to App settings > Basic from the sidebar
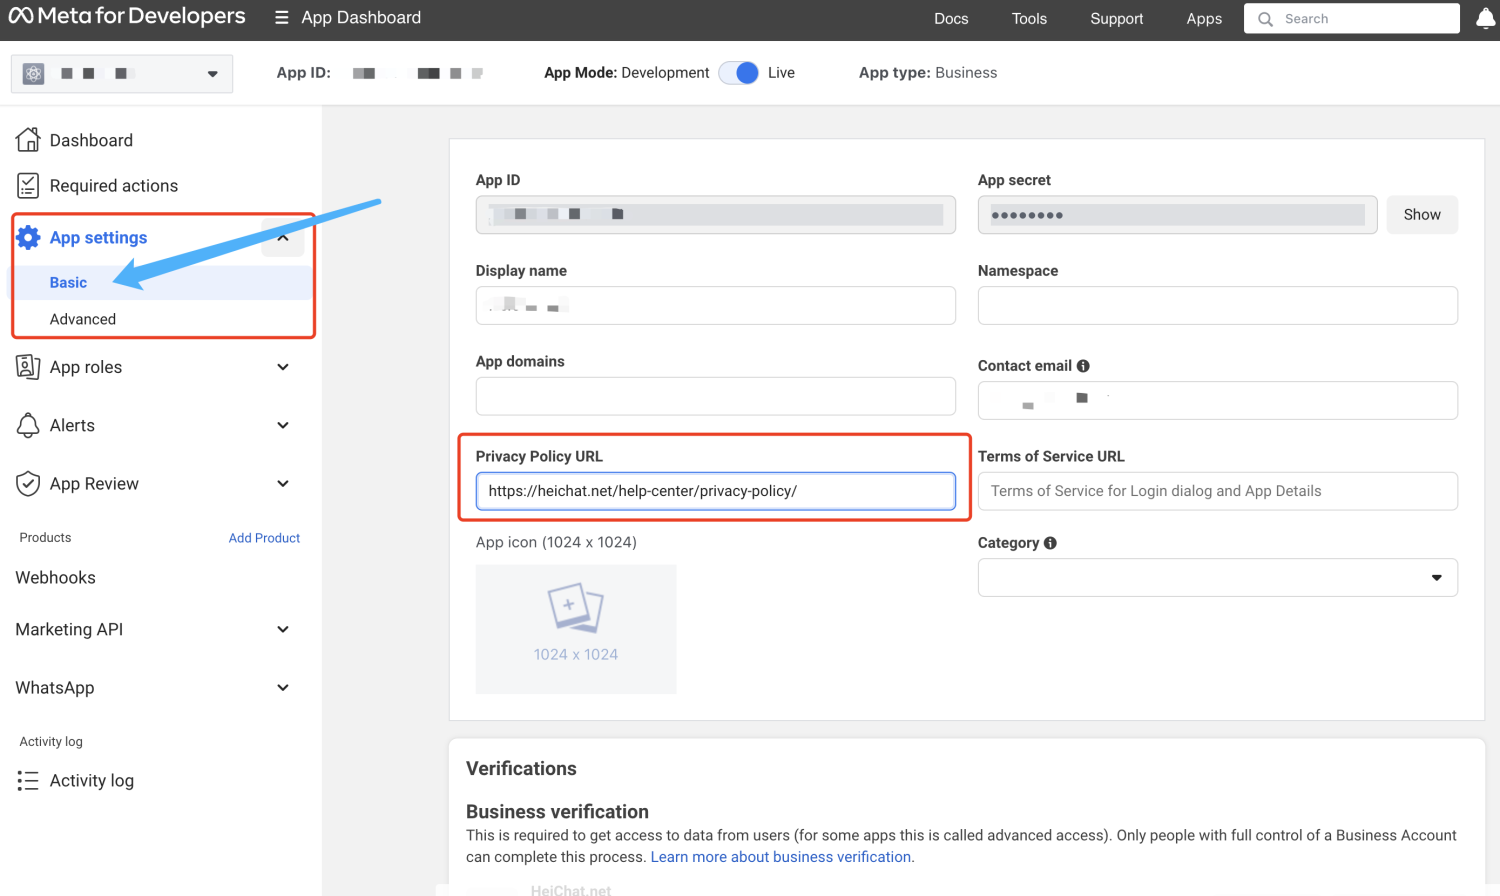
Set the Privacy Policy URL to https://heichat.net/help-center/privacy-policy
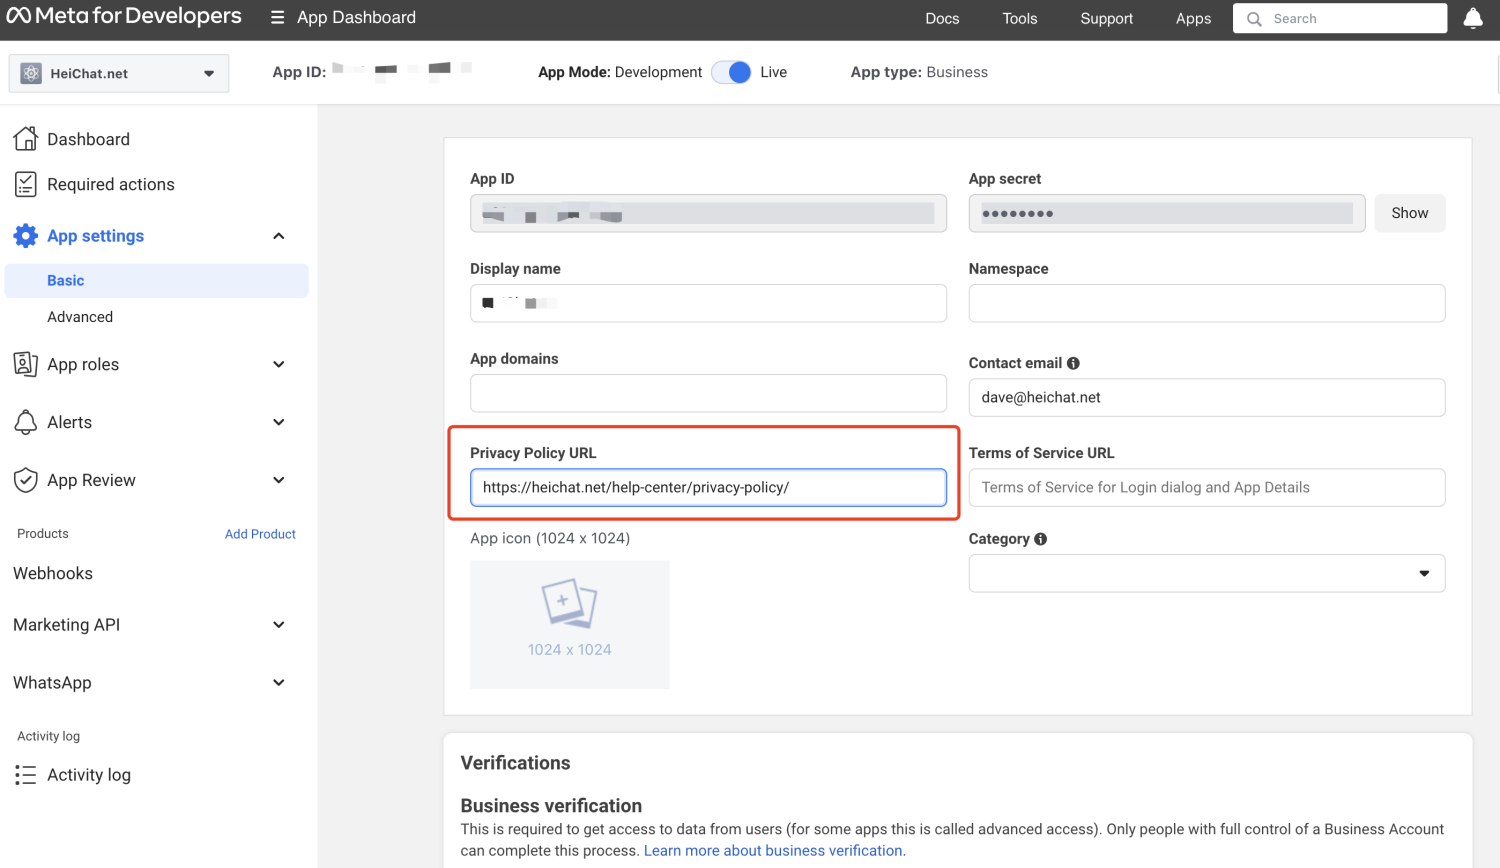
- Save changes.
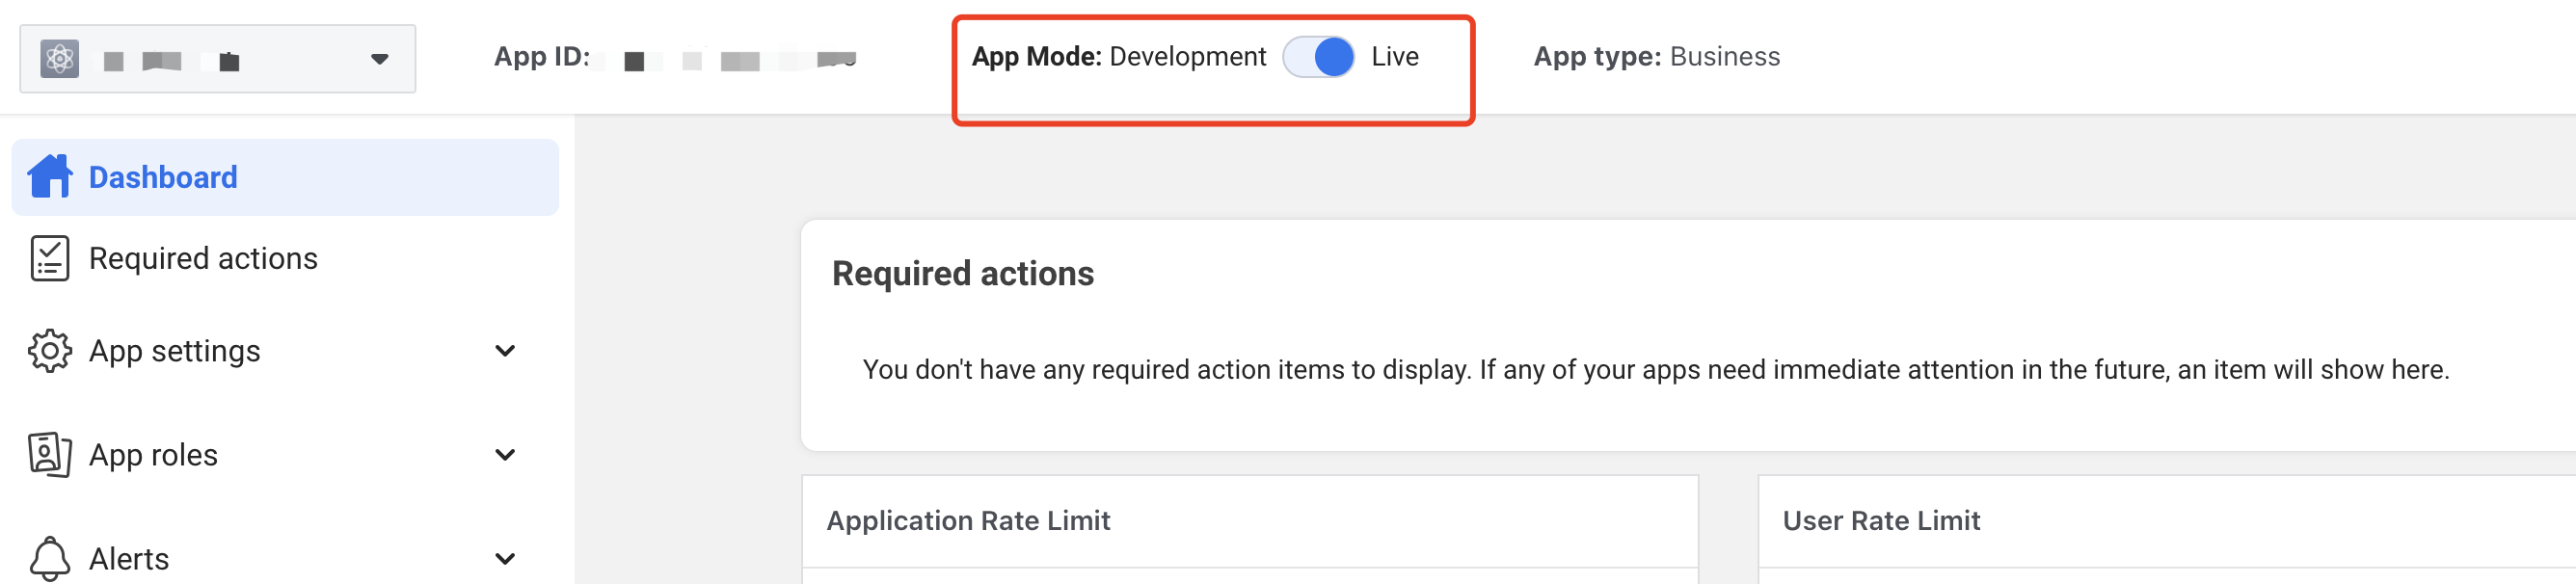
- Set App Mode to Live.
Step 4: Generate WhatsApp Token
To obtain a permanent WhatsApp Access Token, follow 1 to 3 steps:
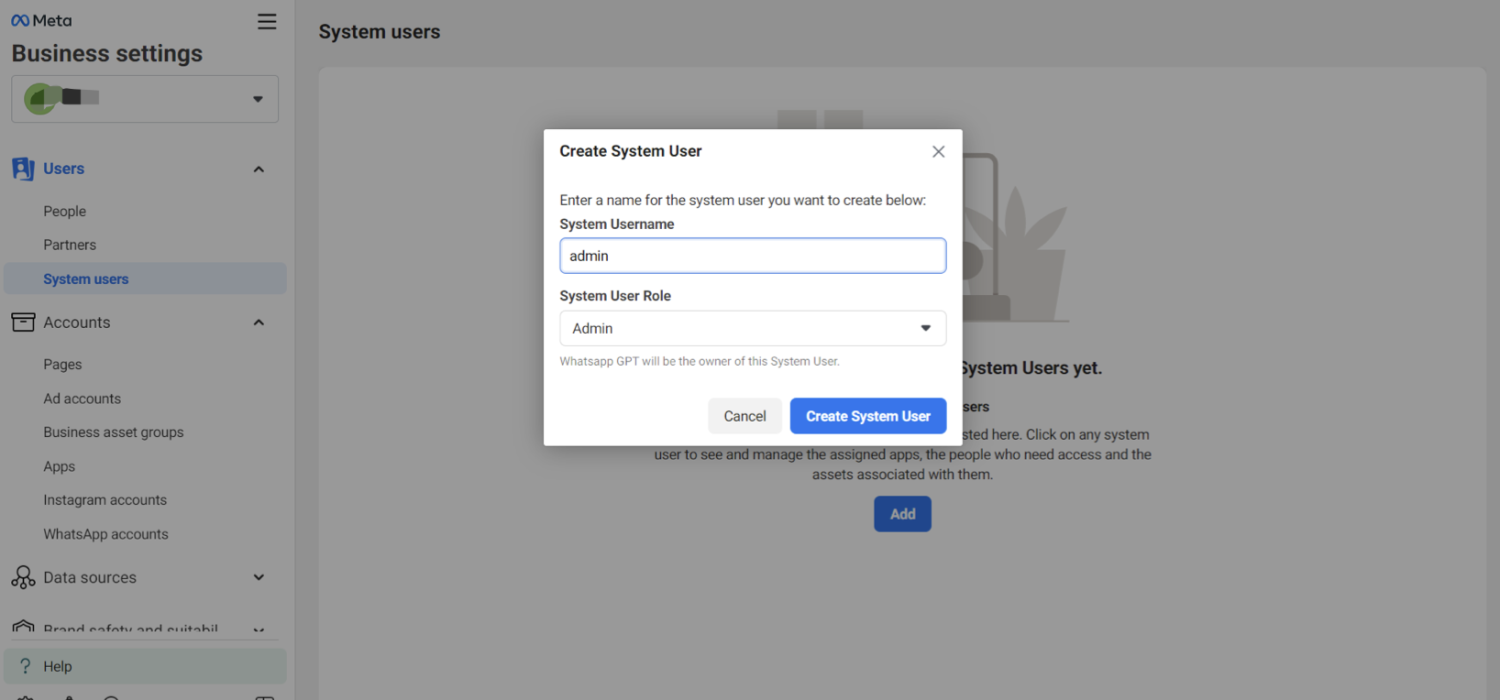
1. Create a "System User":
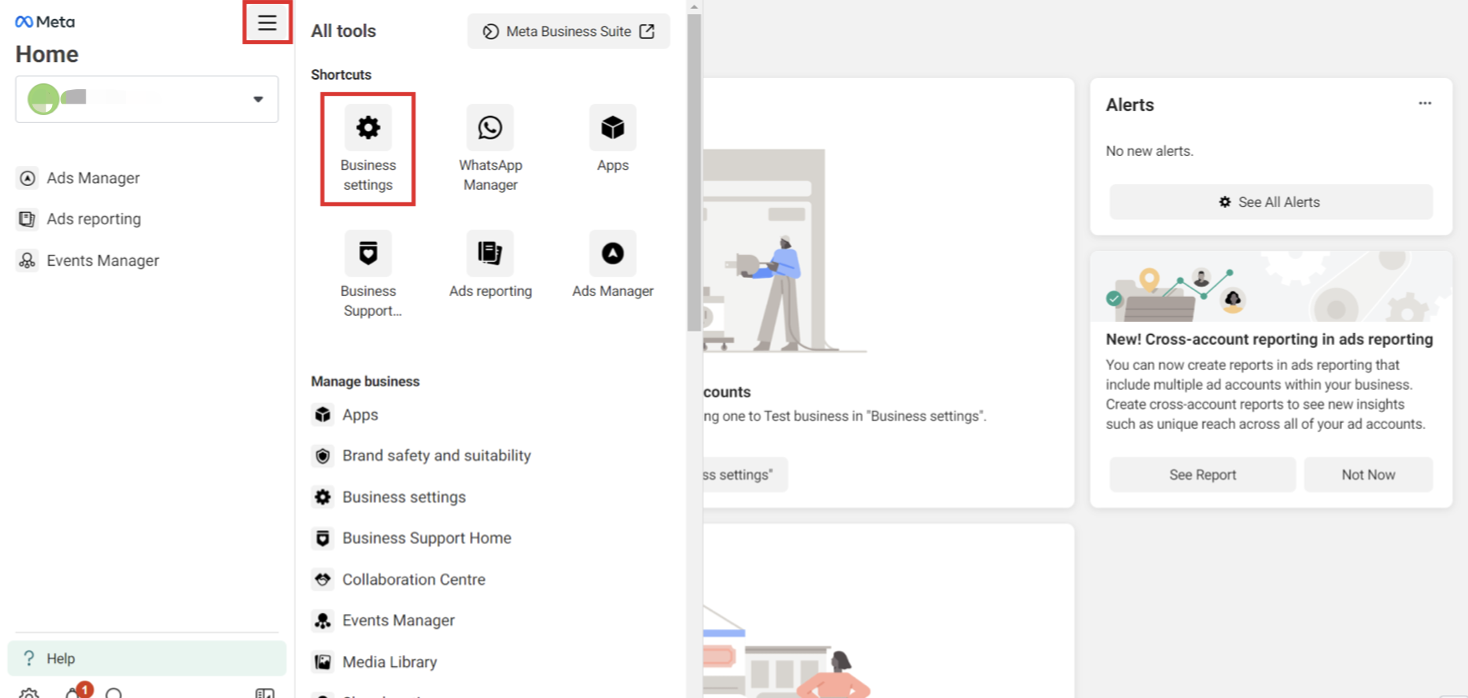
- Visit the Meta Business Suite.
- Find your business account in the top-left dropdown menu and click its Settings (gear) icon.
- Click Business Settings.
- Go to Users > System users.
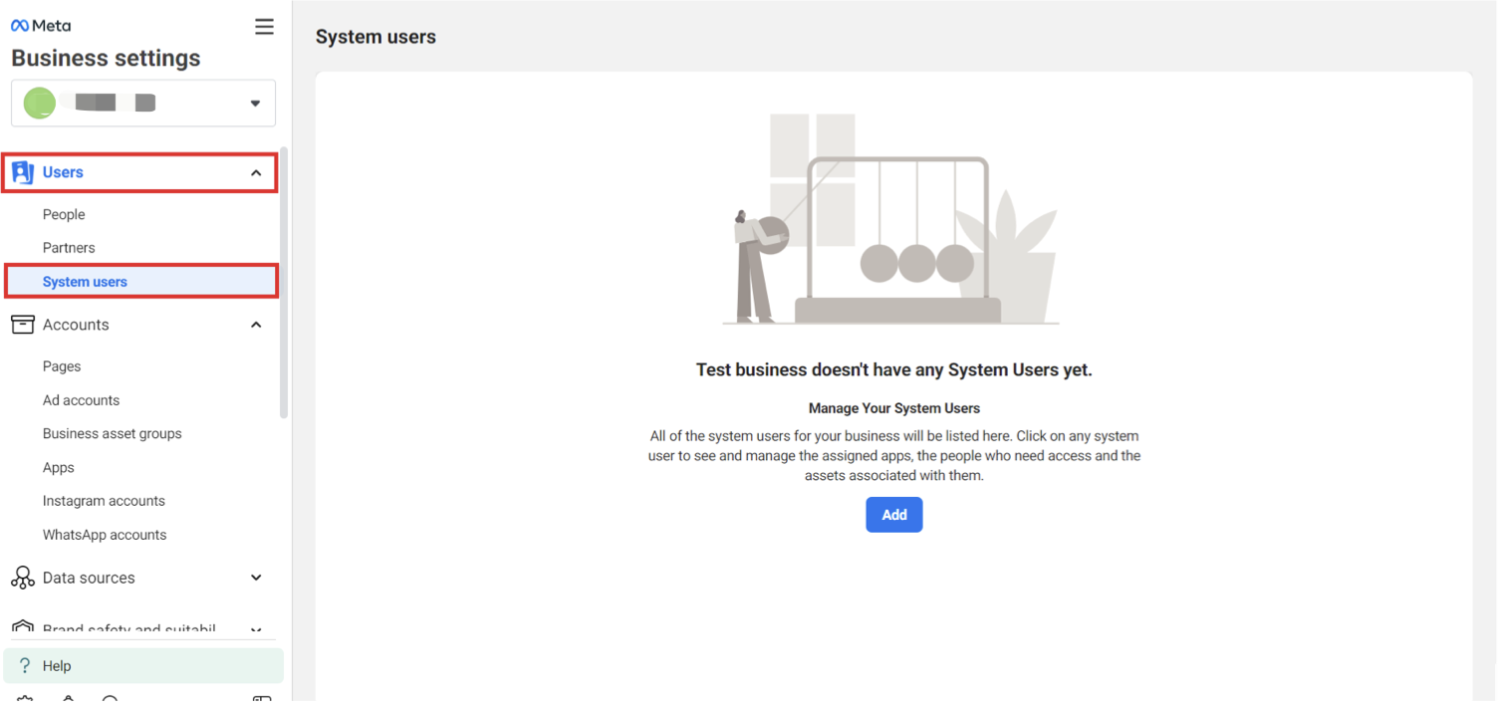
- Add an Admin system user.
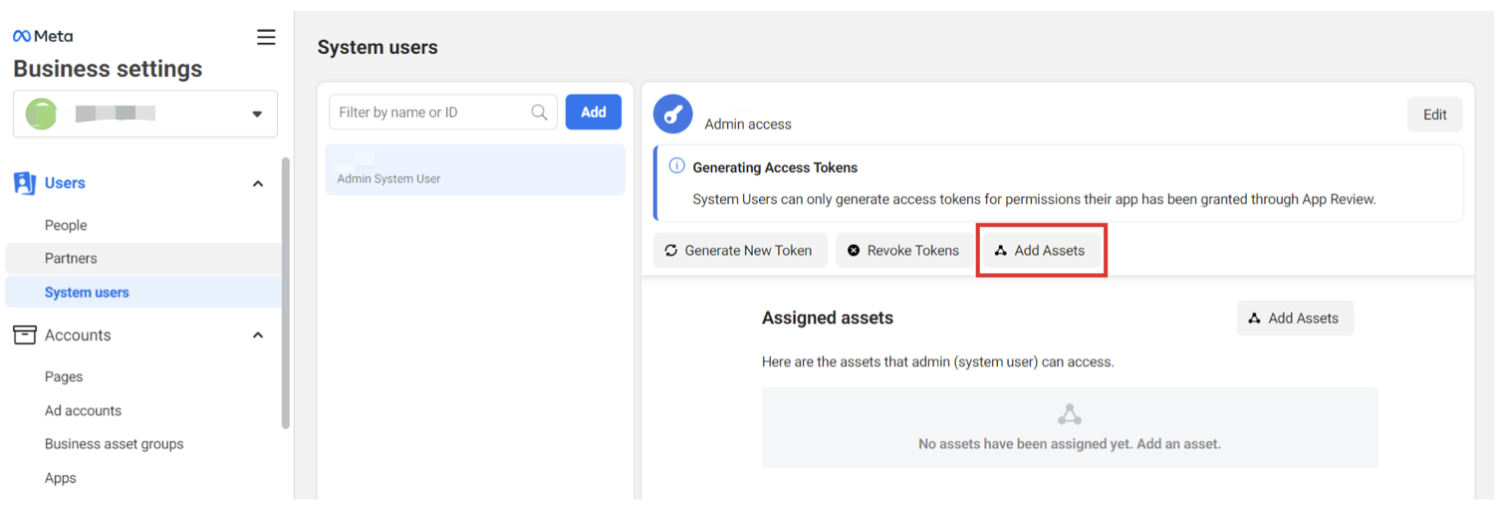
- Add Assets.
- After creating the system user, click on Add Assets.
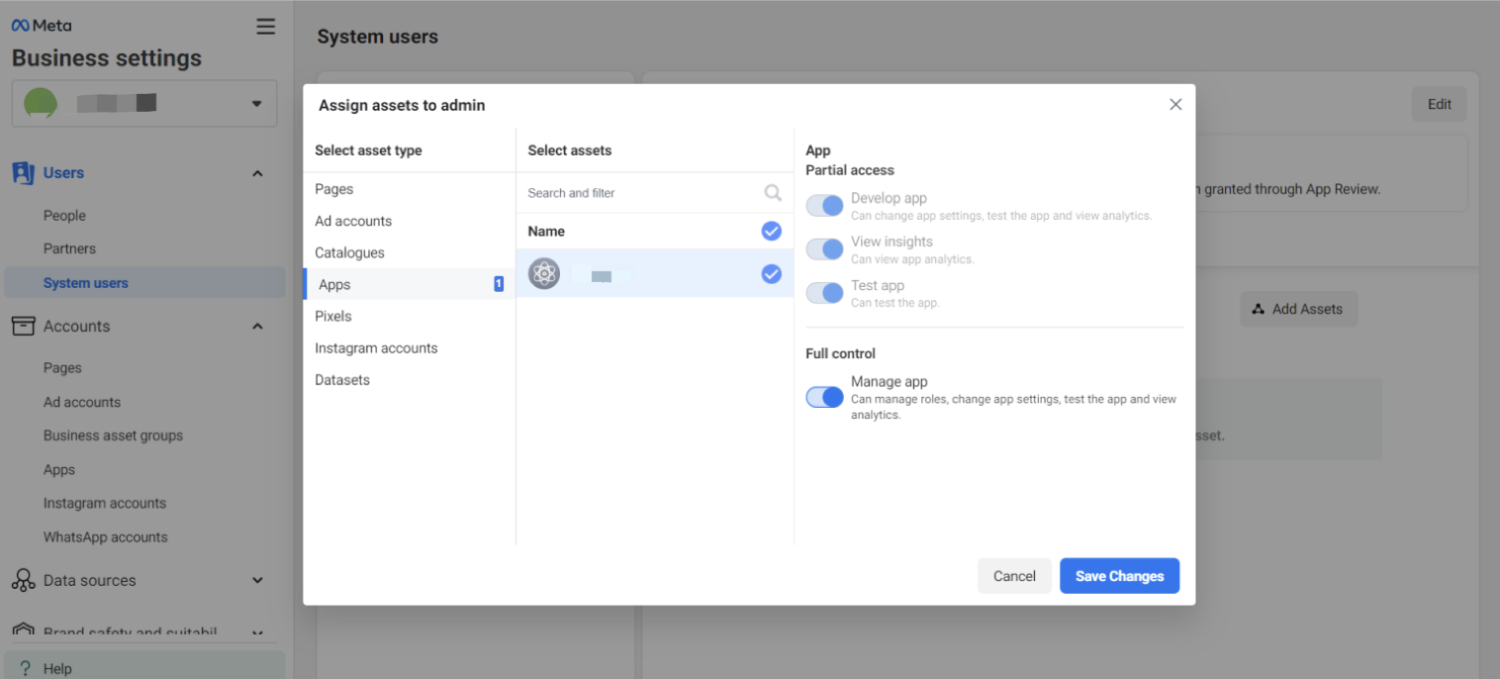
- Navigate to Apps > "Your app name".
- Select your app and grant full control to manage the app.
- Generate System User Access Tokens.
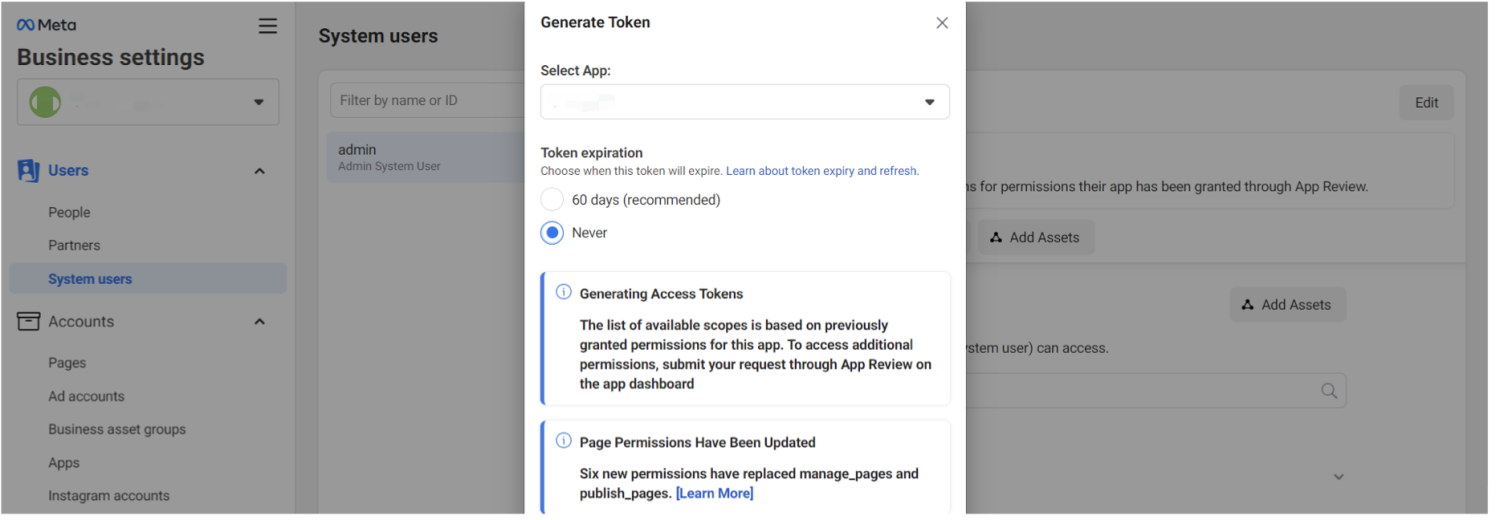
- Click the Generate New Token button on the system user.
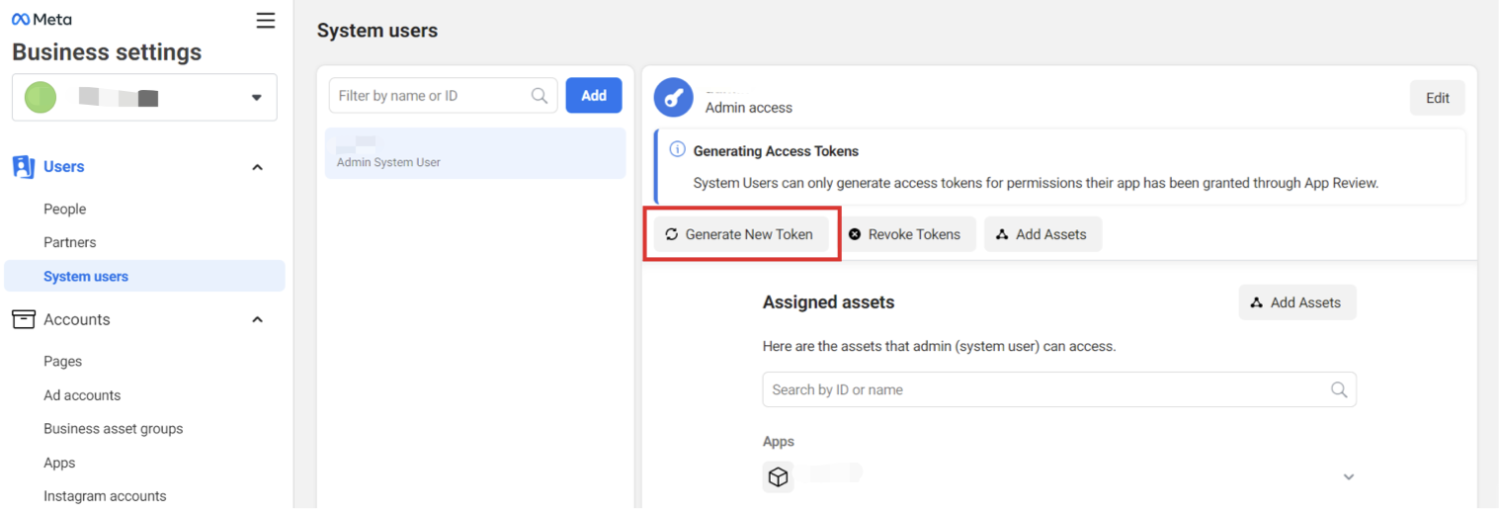
Choose the app that will use the token and set the token expiration to never.
- Select "whatsapp_business_messaging" and "whatsapp_business_management" permissions.
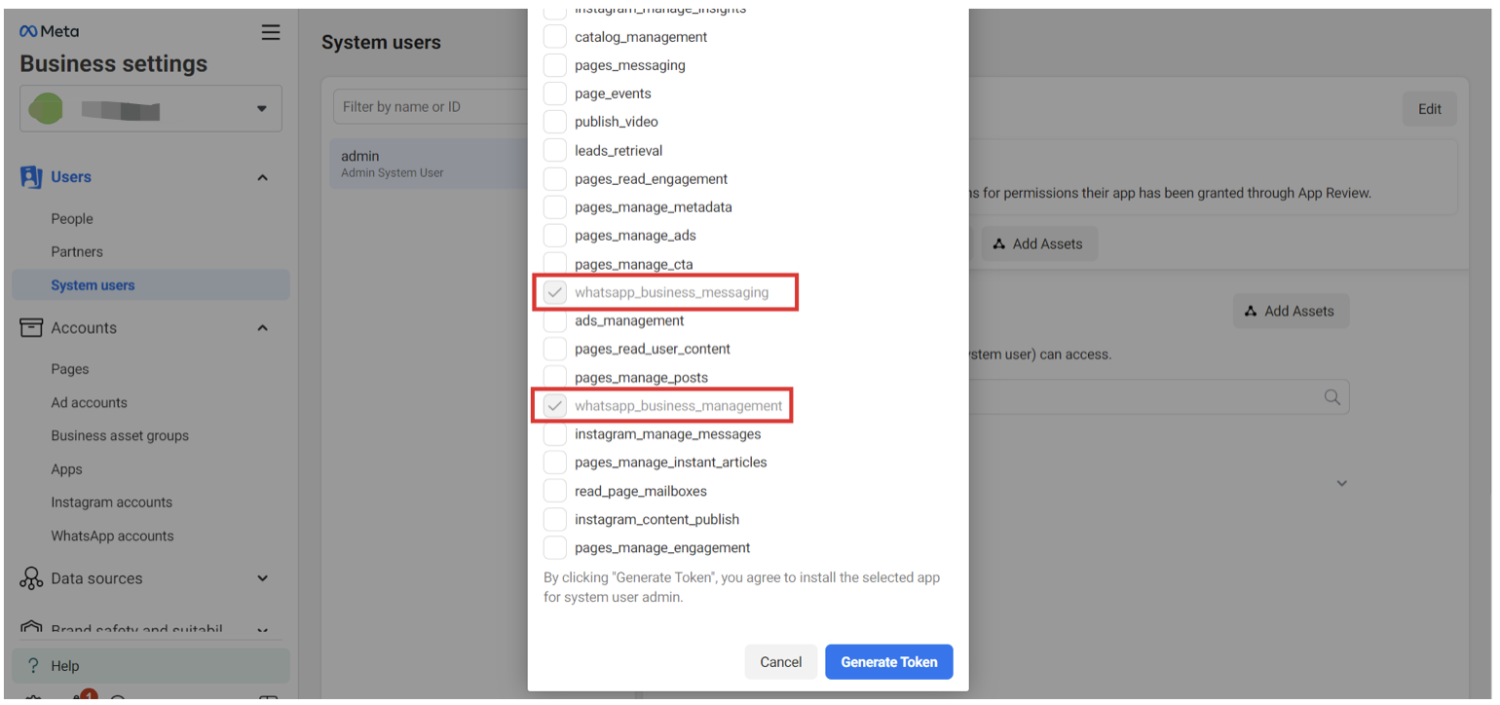
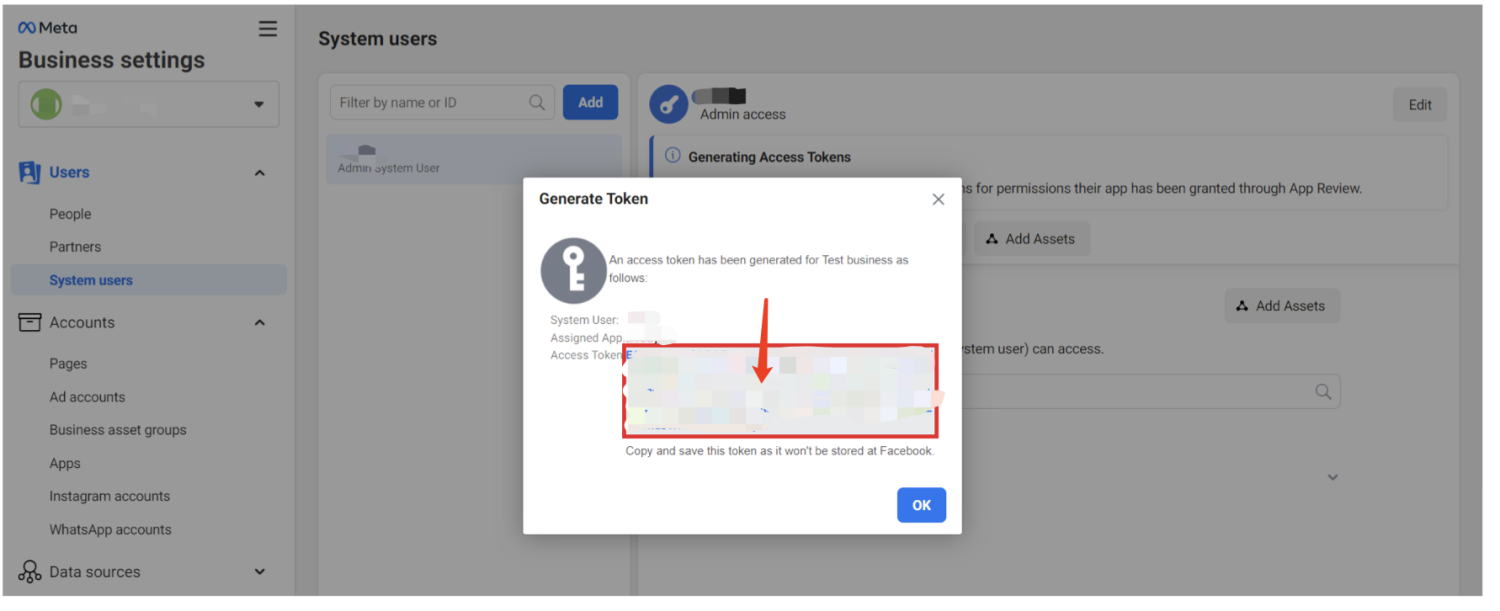
- Generate the token.
- Copy the access token and store it securely.
- Add a new Business Number for WhatsApp
- You can use your own business number or utilize the provided test number for your WhatsApp chatbot.
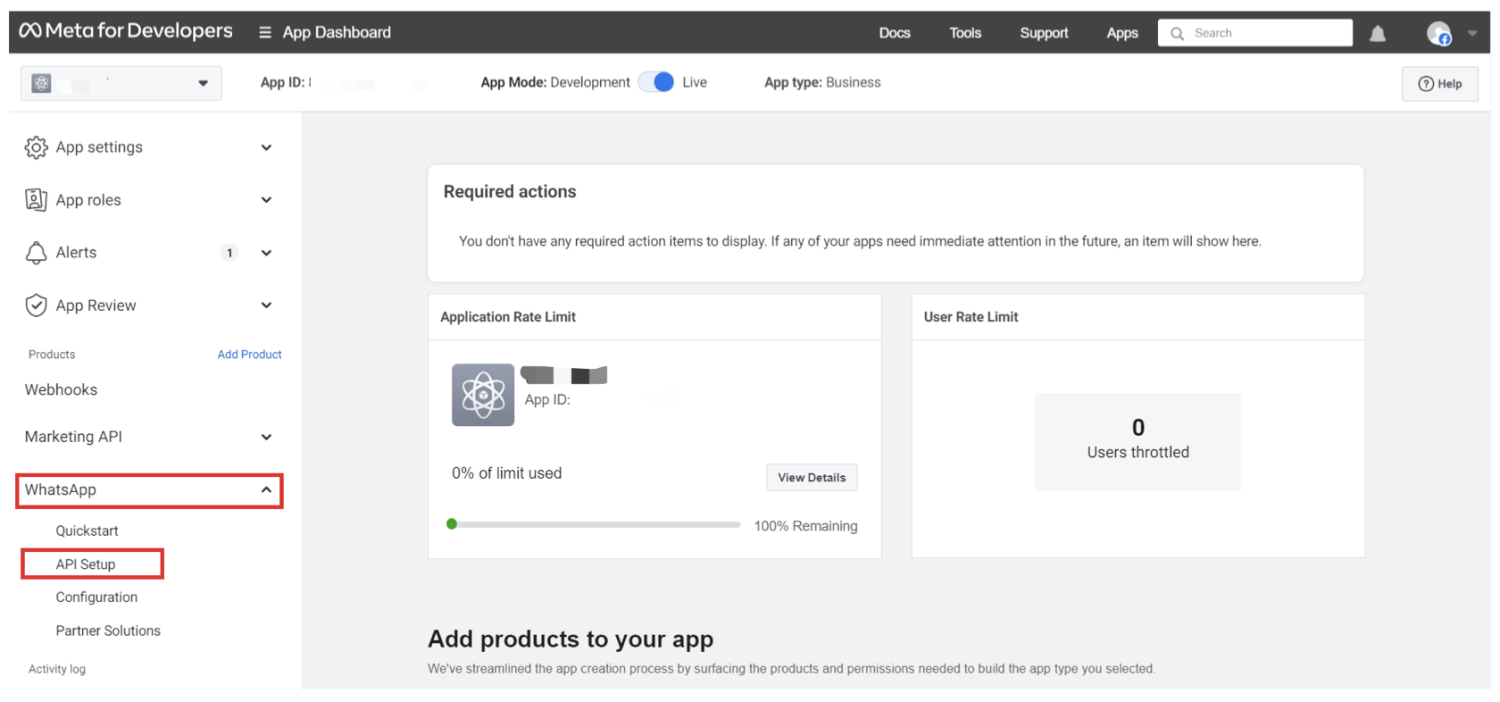
- In WhatsApp Developer Dashboard, navigate to WhatsApp > API Setup from the sidebar.
- Proceed to "Step 5: Add a Phone Number," click Add phone number.
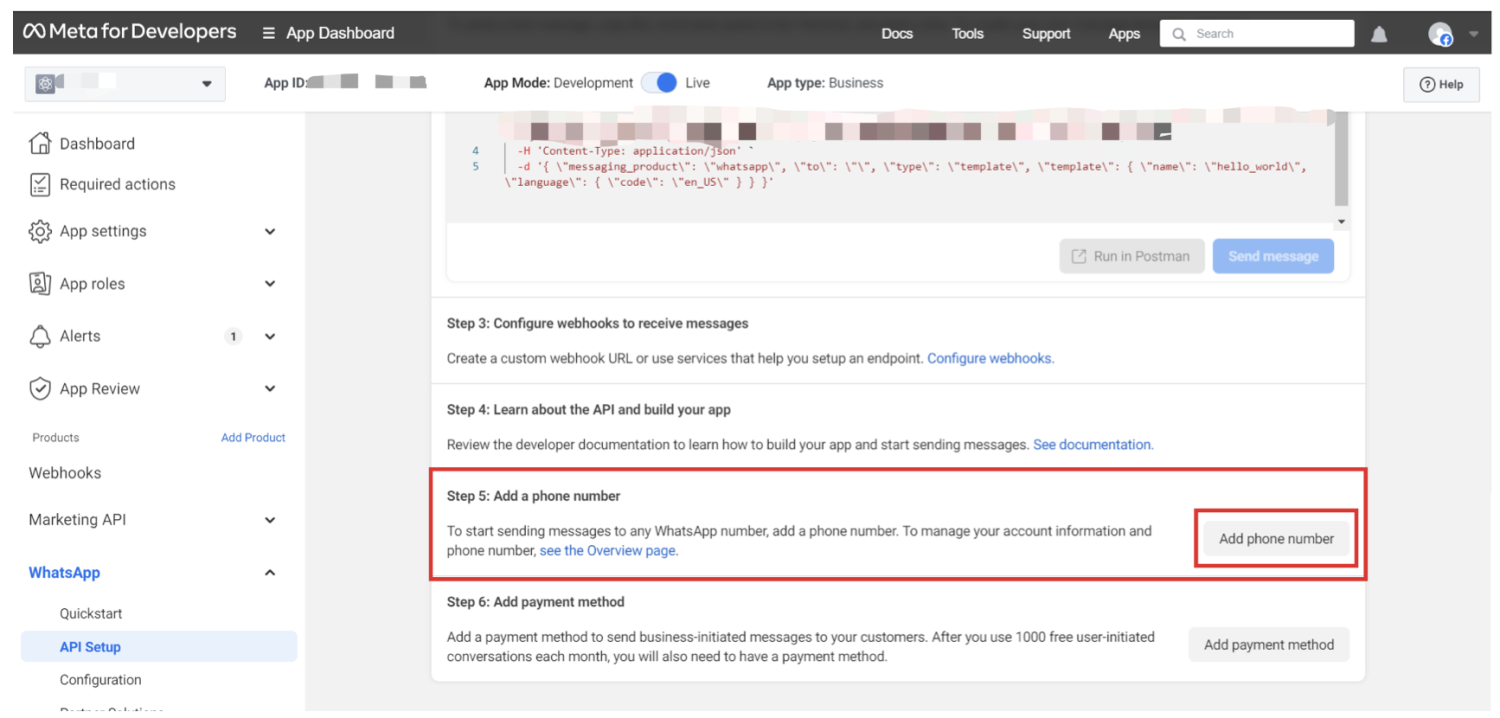
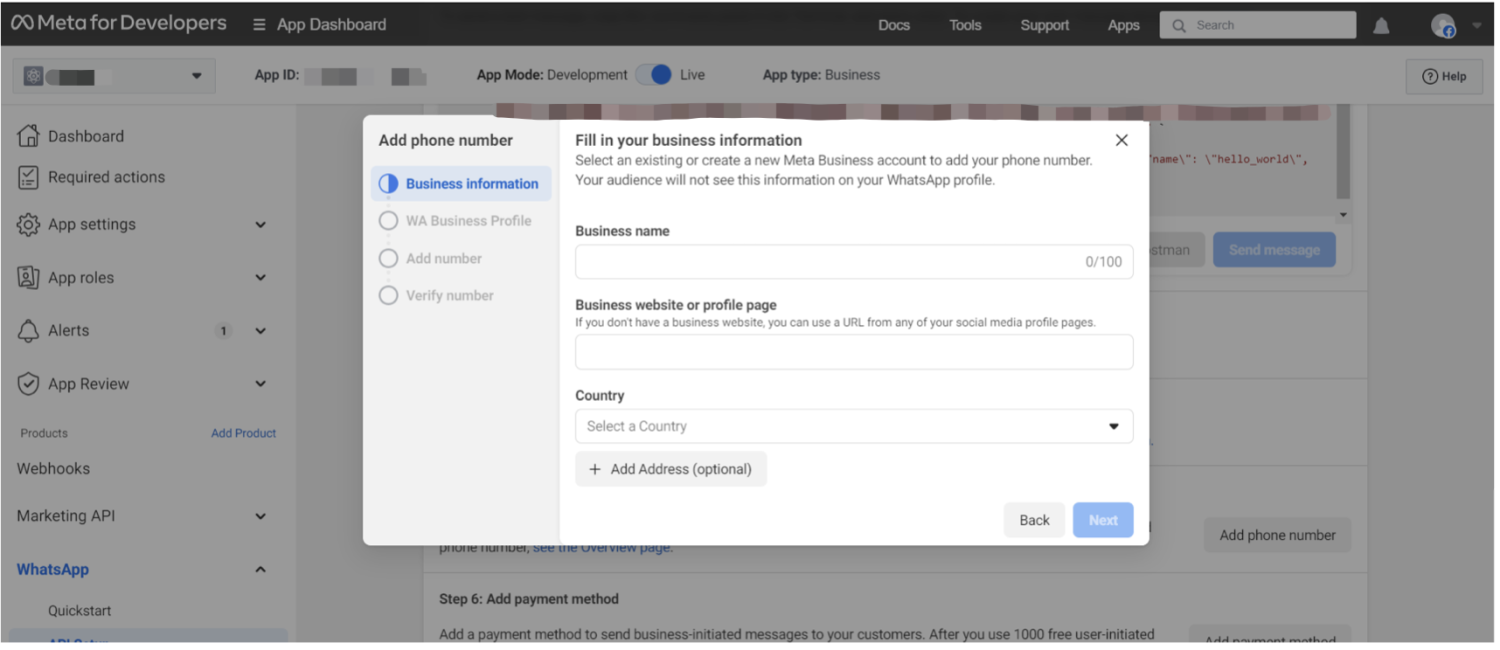
- Provide details required in the following form.
- Verify your number using the received code.
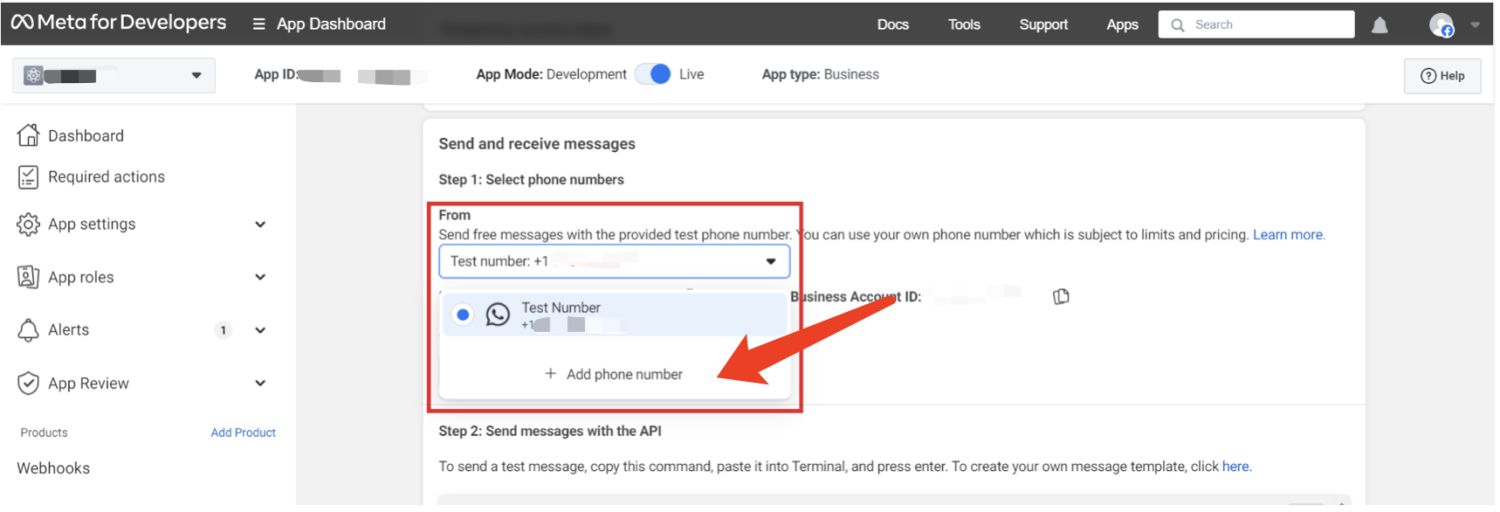
- Once successfully added, select your phone number in Step 1 of API Setup.
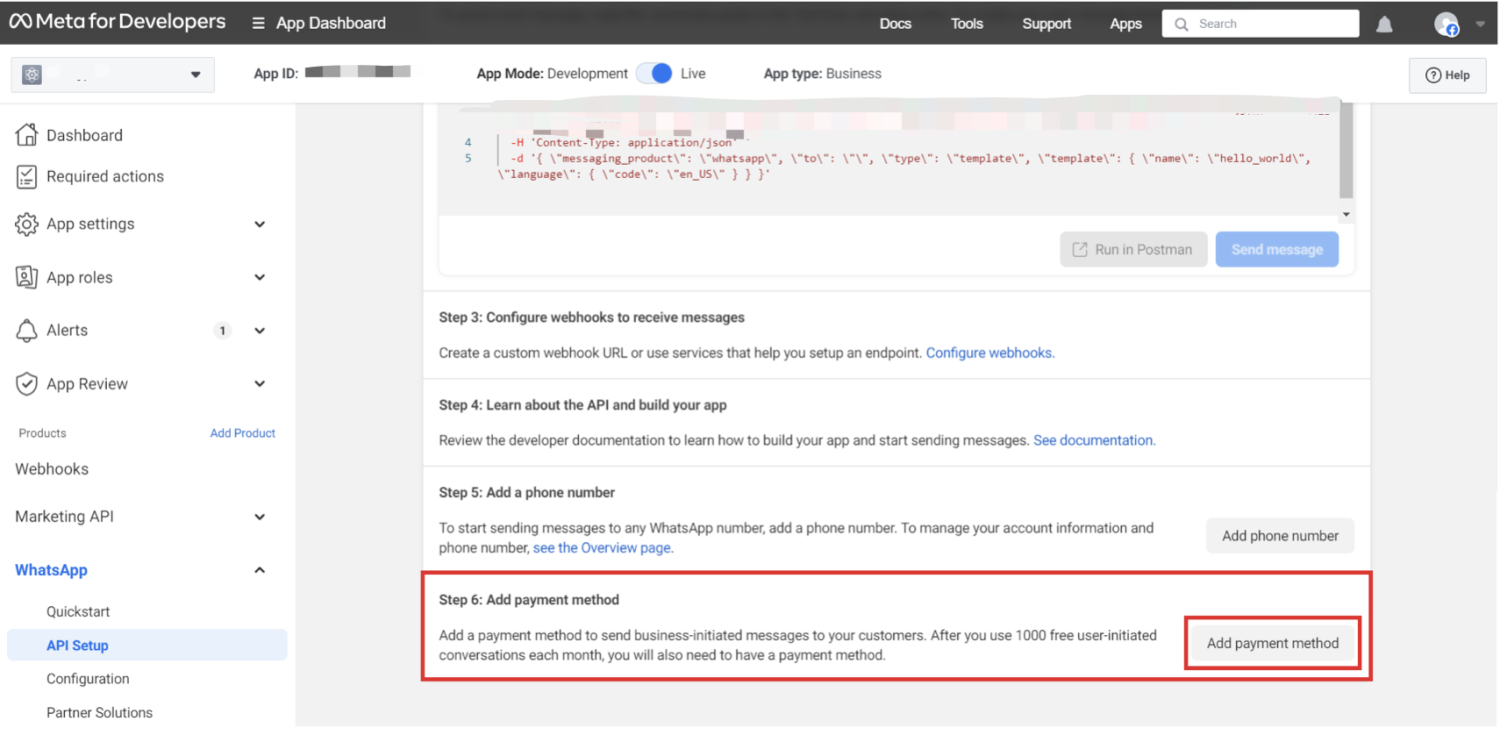
5. Add a Payment Method
- To send messages via WhatsApp, you need a valid payment method. Visit here for details.
- After adding your business phone number, click "Add payment method" to address the "Missing valid payment method" alert.
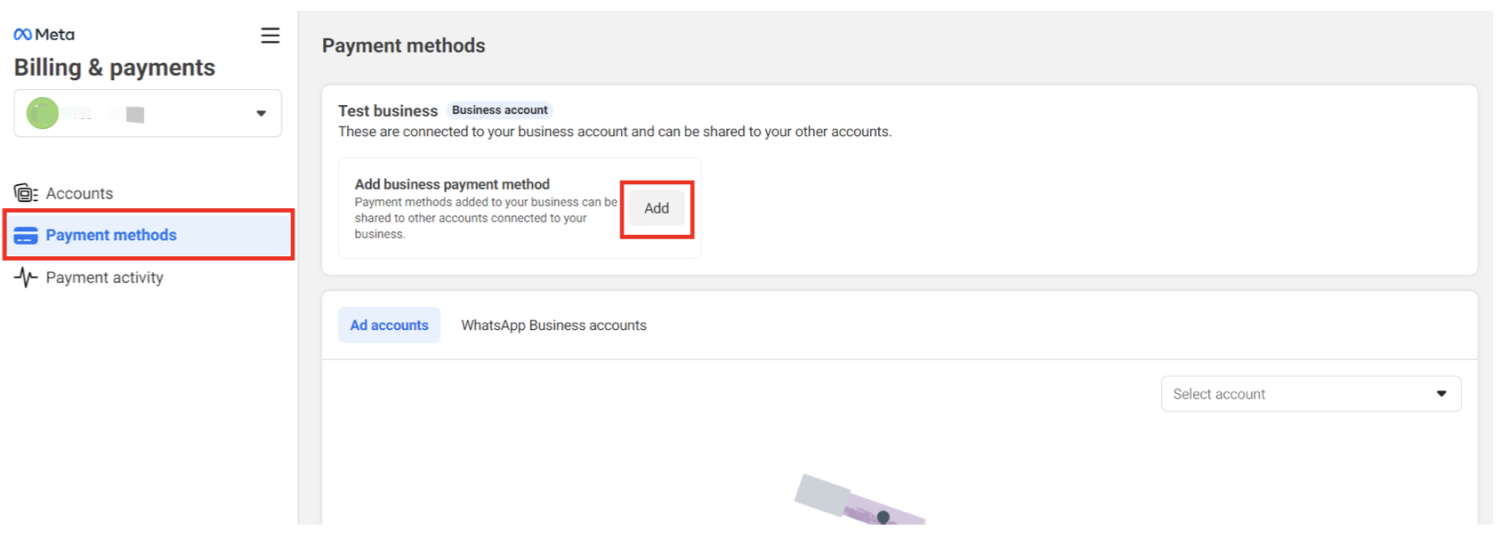
- You'll be directed to your WhatsApp account settings. Click "Payment Methods" > "Add business payment method" and follow the prompts to add your card info.
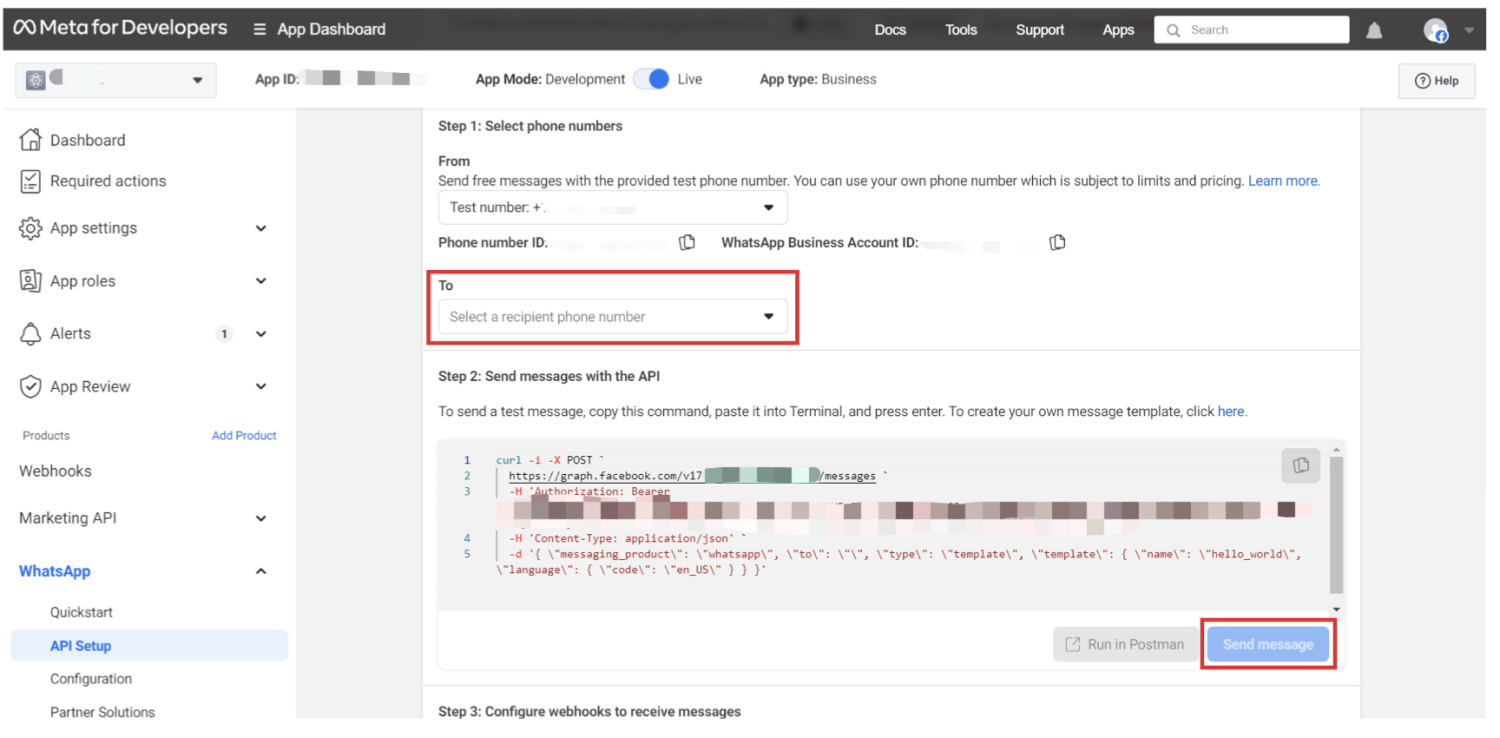
6. Test your new Business Number for WhatsApp
- Return to WhatsApp Developer Dashboard, navigate to API Setup > Step 1.
- Enter a testing "To" number.
- Click "Send message" to verify successful message delivery.
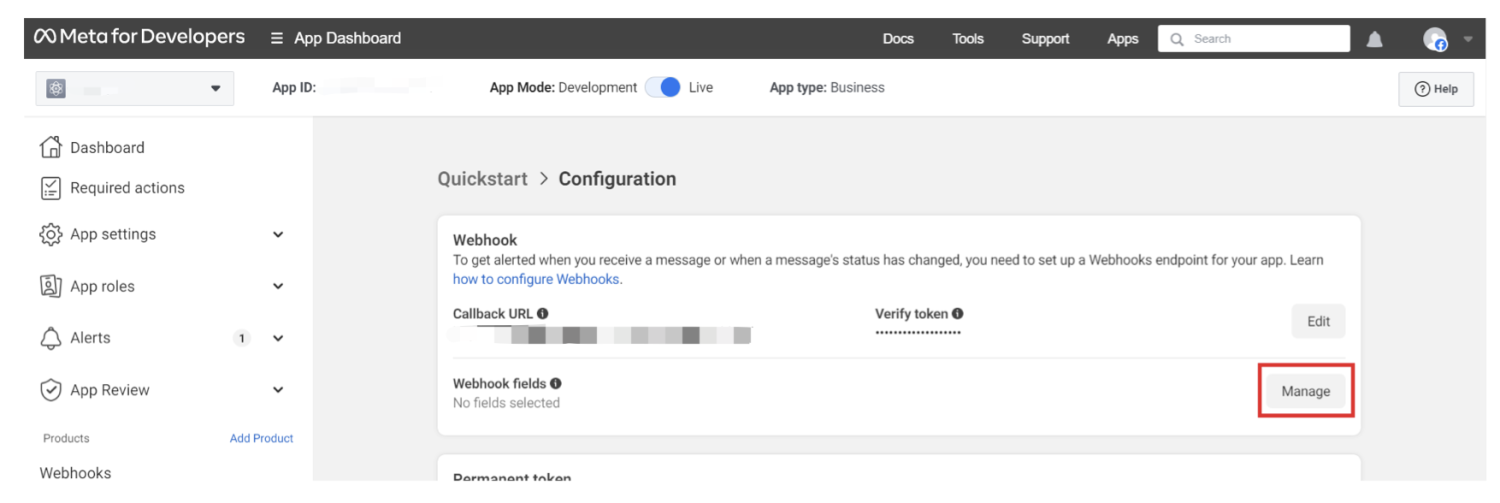
Step 5: Configure WhatsApp API Webhook settings
- Verify WhatsApp Webhook Callback.
- In WhatsApp Developer Dashboard, navigate to Configuration.
- Under Webhook, click edit

- Copy the Callback URL and Verification Token from HeiChat WhatsApp Integration page(or HeiChat email) to your WhatsApp Developer Dashboard.
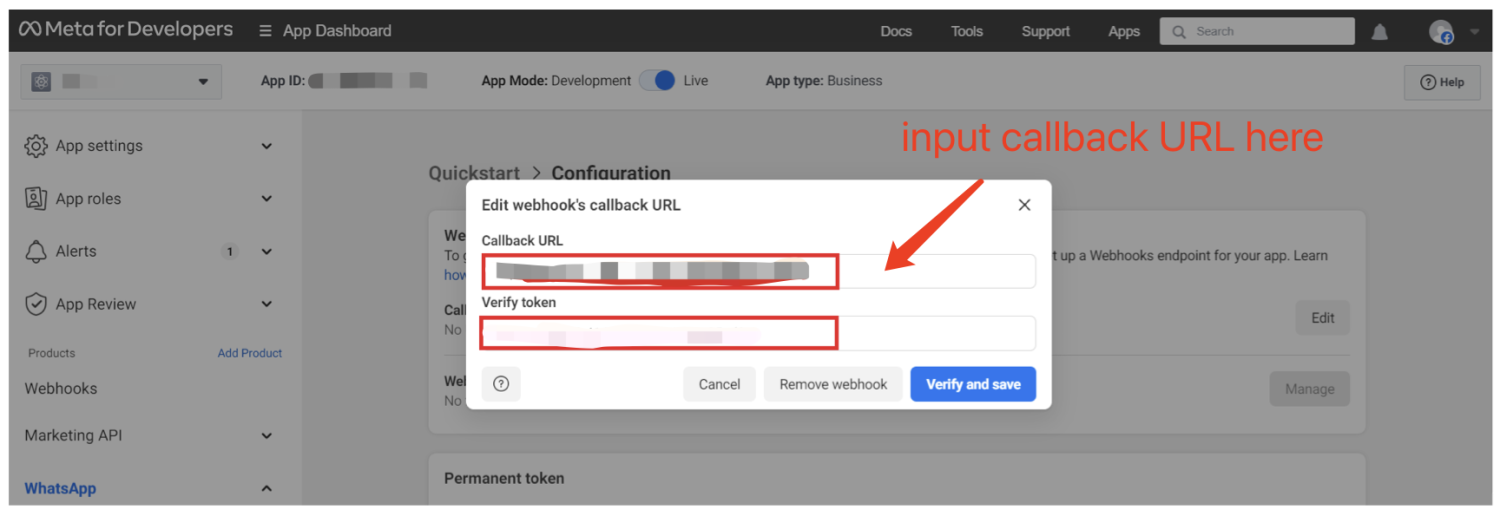
- Click Verify and save
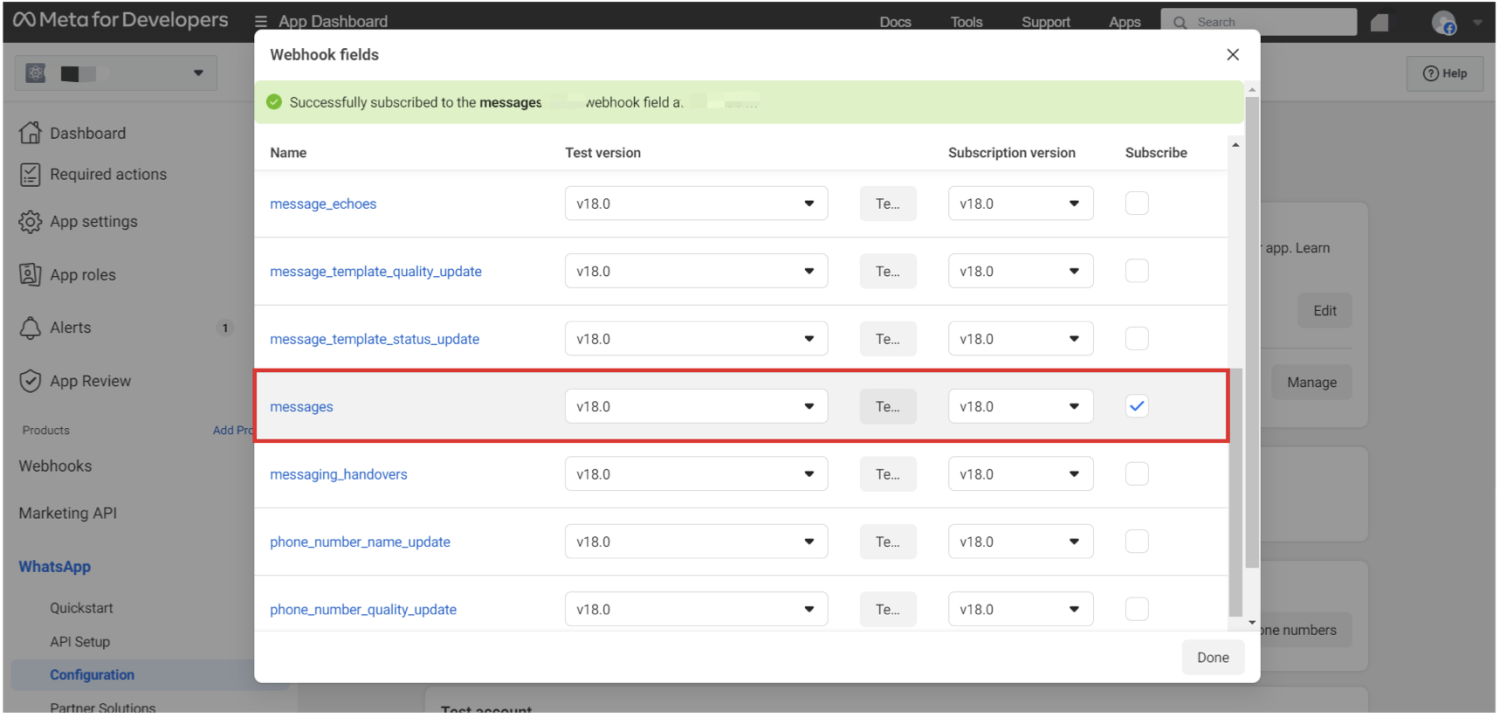
- Configure Webhook Subscription Field
- Under "Webhook Fields," click Manage.
- Find the "messages" field and subscribe to it by checking the box.
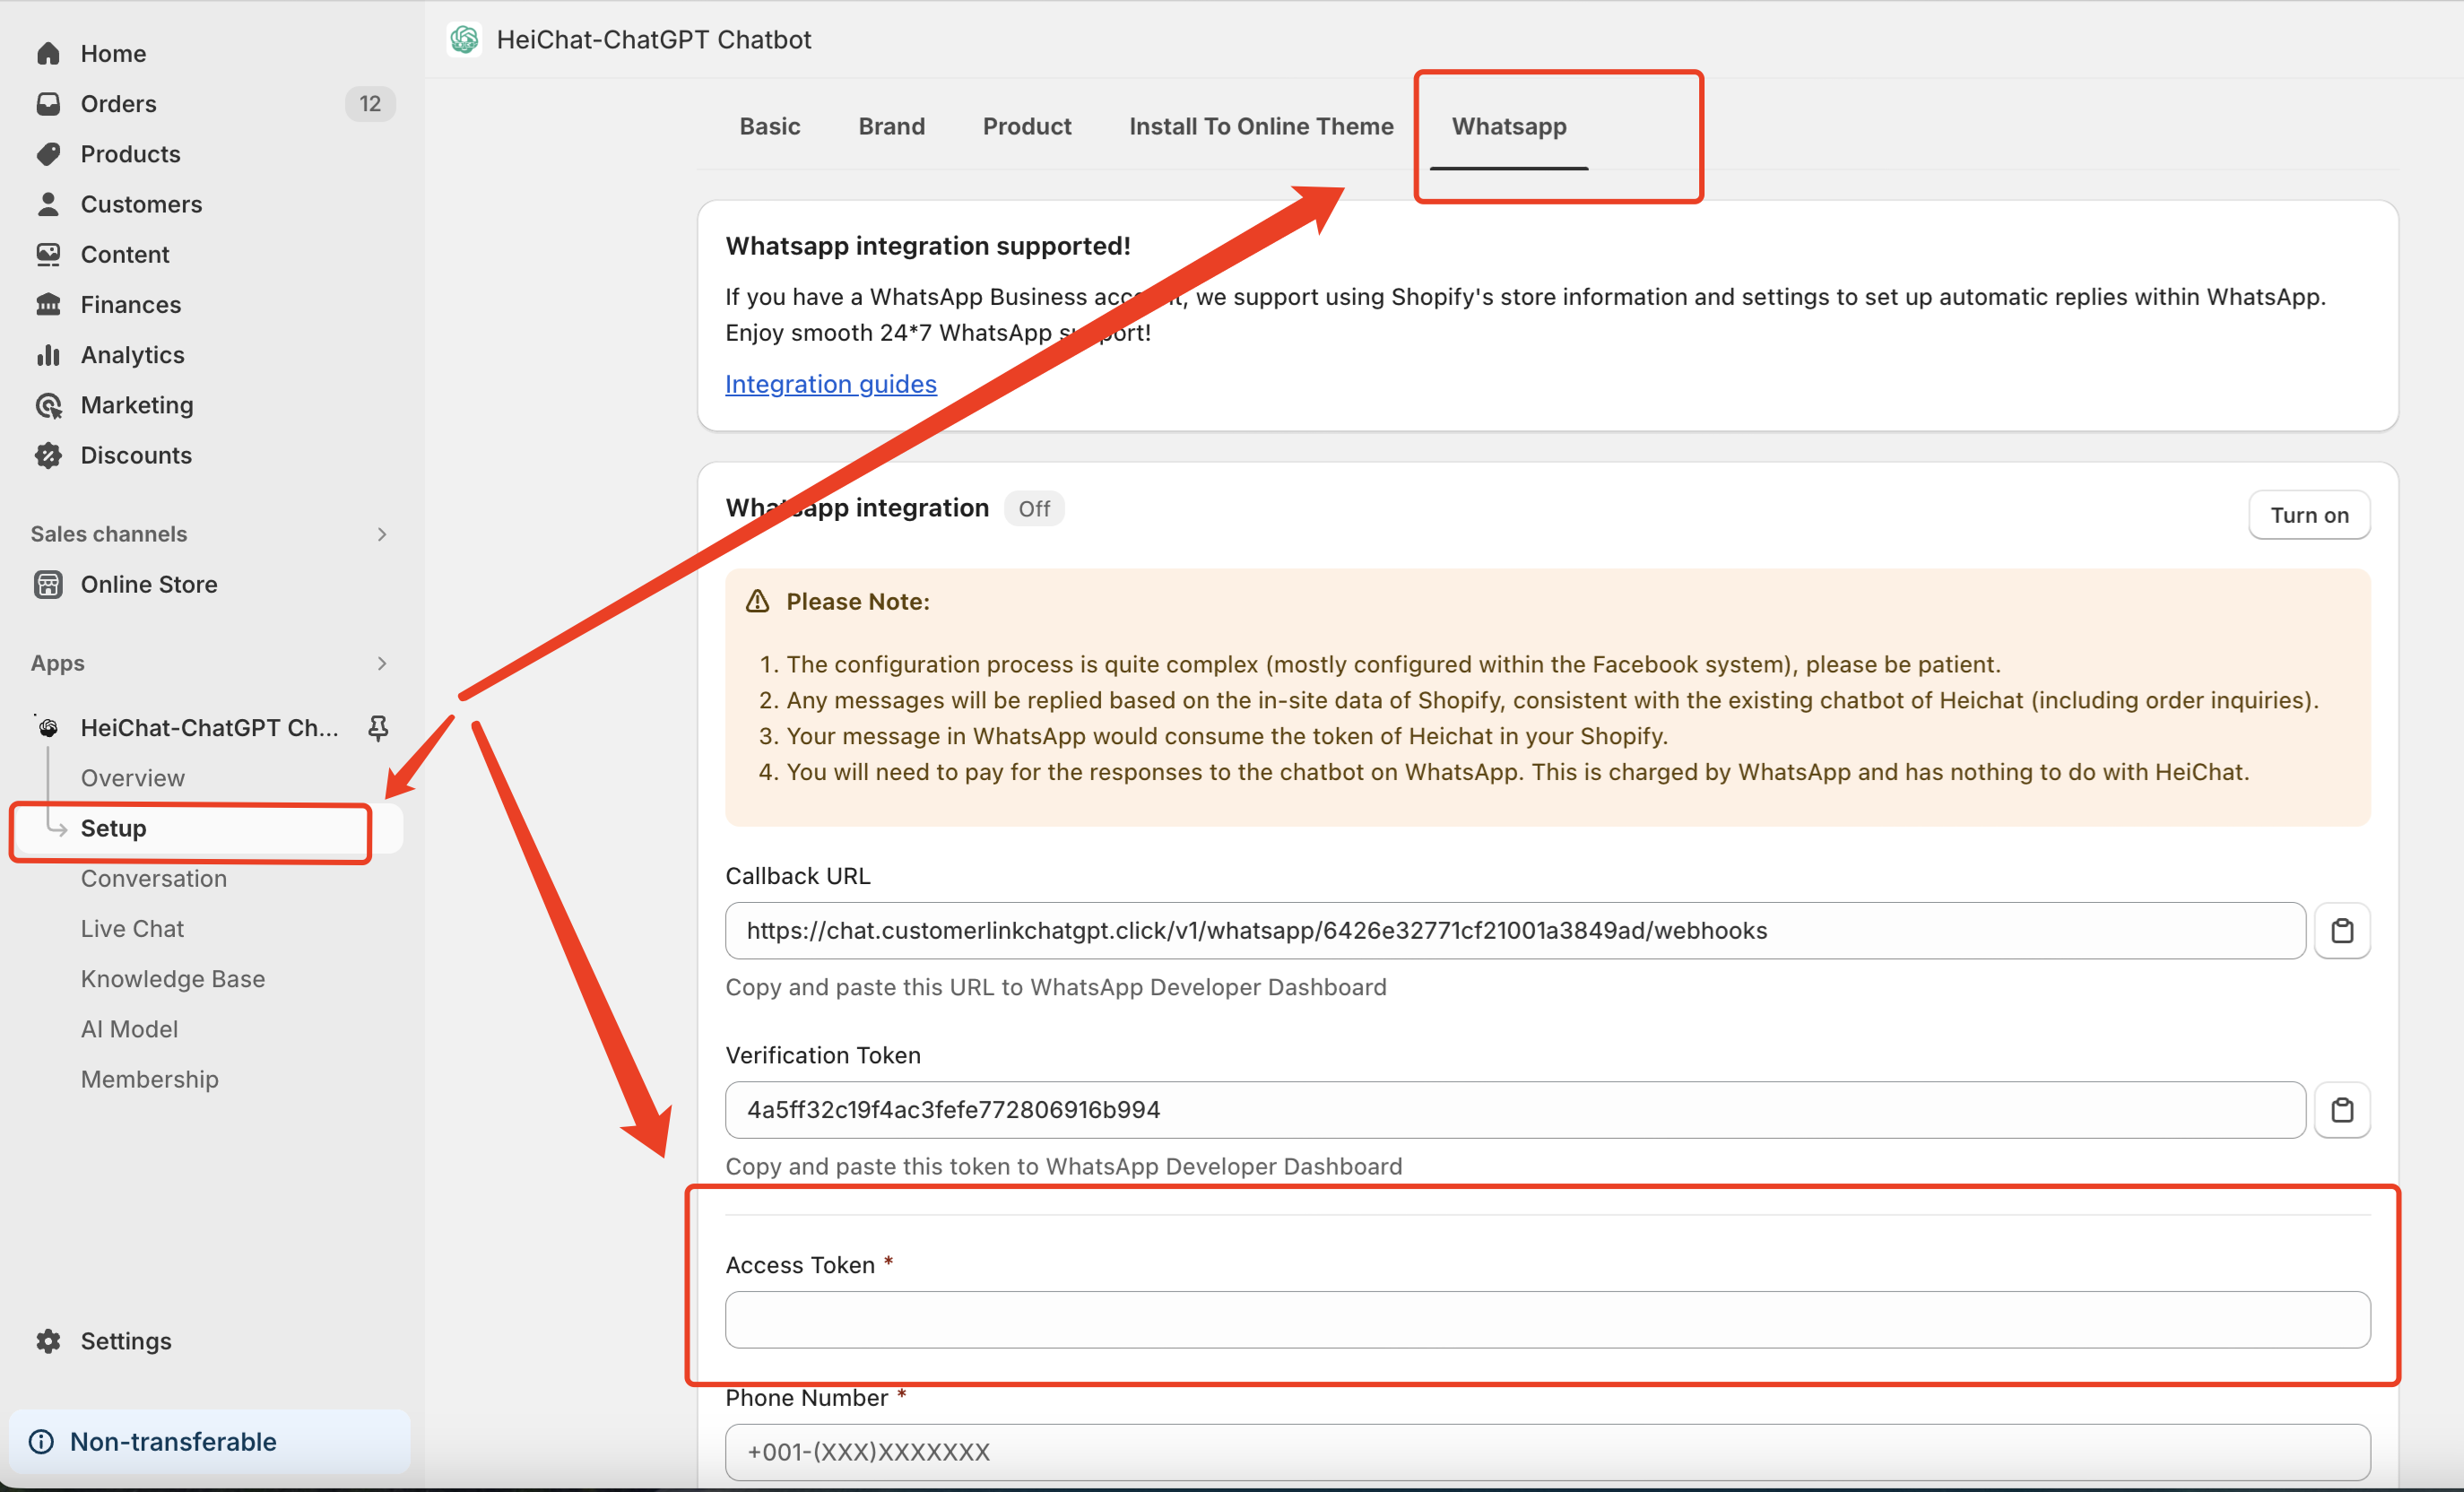
Step 6: Connect your Whatsapp account with HeiChat
1. Retrieve WhatsApp Account Information
- Copy the permanent access token generated from Step 4.3
- Copy your Phone Number,Paste them to HeiChat backend and save
If you have any problems feel free to contact HeiChat's email(heicarbook@gmail.com)
Did this page help you?
YESNO